Food Photography: An Art
- May 1, 2021
- 8 min read
Updated: May 6, 2021
Welcome to the food photography portfolio site of Nisma Aamir.
These days food photography is ever-present on Instagram feeds. Whether you’re a lifestyle influencer, a die-hard foodie, or a home-chef, here are 25 food photography Tips and Tricks and 25 amazing pictures to take your food shoot to the next level – from prepping to editing your pictures.

I am not an expert, I try and I am not ashamed of the achievements so far. I capture, I decorate, I eat; isn't life all about some food-loving?
During my studies, my job and my blog, I barely get time to photograph food anymore. Whenever I do get an opportunity, it is during a Blogger's meetup; where I try to explore the side which is lost somewhere and bring it to life. Here are some Tips that I know of and some Tricks that I follow to get a good shot of what I eat.

How to prepare for a food shoot
Perfection is in the details. Just like cooking, it pays to take some time to prep. Professional photographers call it pre-production.
1. Look for inspiration
Be inspired by the pros and their mastery of photography. Don't hesitate to turn to your favorite food blogs, into an unheard voice.
Blogging gives your site a voice, so let your business’ personality shine through. Put your creative hat on to explore different ways to approach your shoot.

2. Tell a story
What’s your story? What do you want to communicate? From where and when did you get an opportunity to take these click? I usually start by introducing the place, to the menu and end up giving my food ratings in the end.

3. Pick a look: messy, staged, minimal
There are so many ways to give life to an idea. Are you after a realistic, “work in progress” type of look with flour spread by a rolling pin, or shaves of dark chocolate by a mocha bundt cake? Picture a cheeseburger with a big bite, a half-eaten plate of pasta with the utensils askew, a top shot with lipstick-smudged napkins. It’s all about giving your photos an edge — in this case, a beautiful mess with people making an appearance.

4. Pick a color palette
Picking a colour palette is very important as it just does not determine your taste and style but also provides the feel to your feed. Consider how a combination of colors will play out in the final composition, the ingredients in a plate, against the background, and some props. Do you want a muted palette or clashing colors? Mostly food photography is associated with warm tones such as red, brown, orange, black, etc.

5. Draft the shot
Making a drawing of all the elements in the photograph will help you preview how it might look and experiment with the combination of elements and how you want to frame the scene.

How to compose a food shot
The composition is the essence of good design and any artistic expression.
6. Frame it
Use the rule of thirds if you’re not sure where to place your dish in a frame. Divide the frame into nine imaginary squares. Then put the food where the lines of those squares intersect. Thankfully, most cameras have a grid line or cropping function which you can turn on if you’re having trouble visualizing those lines. Once the gridlines appear on the screen, you’ll have an easier time composing your image.

7. Allow for negative space
Compose with some negative space around the main focus of the picture. It will breathe better and is easier on the eyes. Negative space is always beneficial if you will be further designing on your post. Graphic Designing requires an empty space near the captured object.

8. Is it vertical or horizontal?
The beauty of a vertical framing is that it appears larger on some website templates and on Pinterest. Vertical shots are also easier to crop down.

9. Best angles for food pics
Mastering the art of the flat lay – the top shot popularized by Instagram –, is a valuable skill to portray food such as pizza, salad bowls, and open-faced sandwiches. Different types of food are best seen from other angles. Food with layers, such as burgers and cakes are best shot from the side to show all the details that would otherwise be out of view in a top shot. Shooting from a 45-degree angle is a good compromise and works for most types of food. I personally take a lot of top shots as it provides the full-image details in a single shot.

How to manage the food and plating Here are some tricks to make your food look delicious.
10. Pick your produce Choose your produce wisely. Fruit and vegetables don’t need to be perfect, and often, a knobbly bump or a leaf will enhance rather than detract from your scene. Instead of making your dish perfect, think about humanizing it by including scattered ingredients or crumbs on the side of the shot. This way, you don’t have to spend as much on props and can introduce the produce in its natural state before it goes into the dish.

11. Glaze hot food Food can dry out extremely quickly, especially when it’s hot. This is true with anything that has been fried or baked, which can look tough and shriveled on camera. To fix this, brush hot food with oil over the top. Use a basting brush and get your garlic glistening, so it has a tasty sheen for the camera. If Glazing is not available to you and you're an amateur food photographer, make sure you cover the sides which show dripping cheese or a melted one. It adds the desired feature to grasp the attention.

12. Include drinks when styling
Often, you’ll want to shoot a nice cold, refreshing drink alongside your perfectly-plated dish, especially in summer. For icy cold drinks, real ice cubes are great for quick shots, especially with a range of ice trays now available in every imaginable size and shape. I mostly drink a lot of coffee and take a lot of coffee shots, in a container, a cup or an open cup.

13. Create the illusion of heat
Use your creativity to manipulate the scene and make the food appear hot. For example, to get perfect grill marks, you need to get your grill nice and hot and press down the food with just the right pressure.
Another trick is to undercook dishes like roast chicken or carrots, so they don’t turn too brown or shriveled. This is a nice way to keep your shots fresh and bright. Don’t forget, food often shoots best without too much interference, so consider your image and recipe beforehand.

14. Use cooking utensils as a prop
Many photographers prefer kitchen appliances, cooking utensils and decor that matches their aesthetic eye. I personally prefer chopping or wooden boards personally.

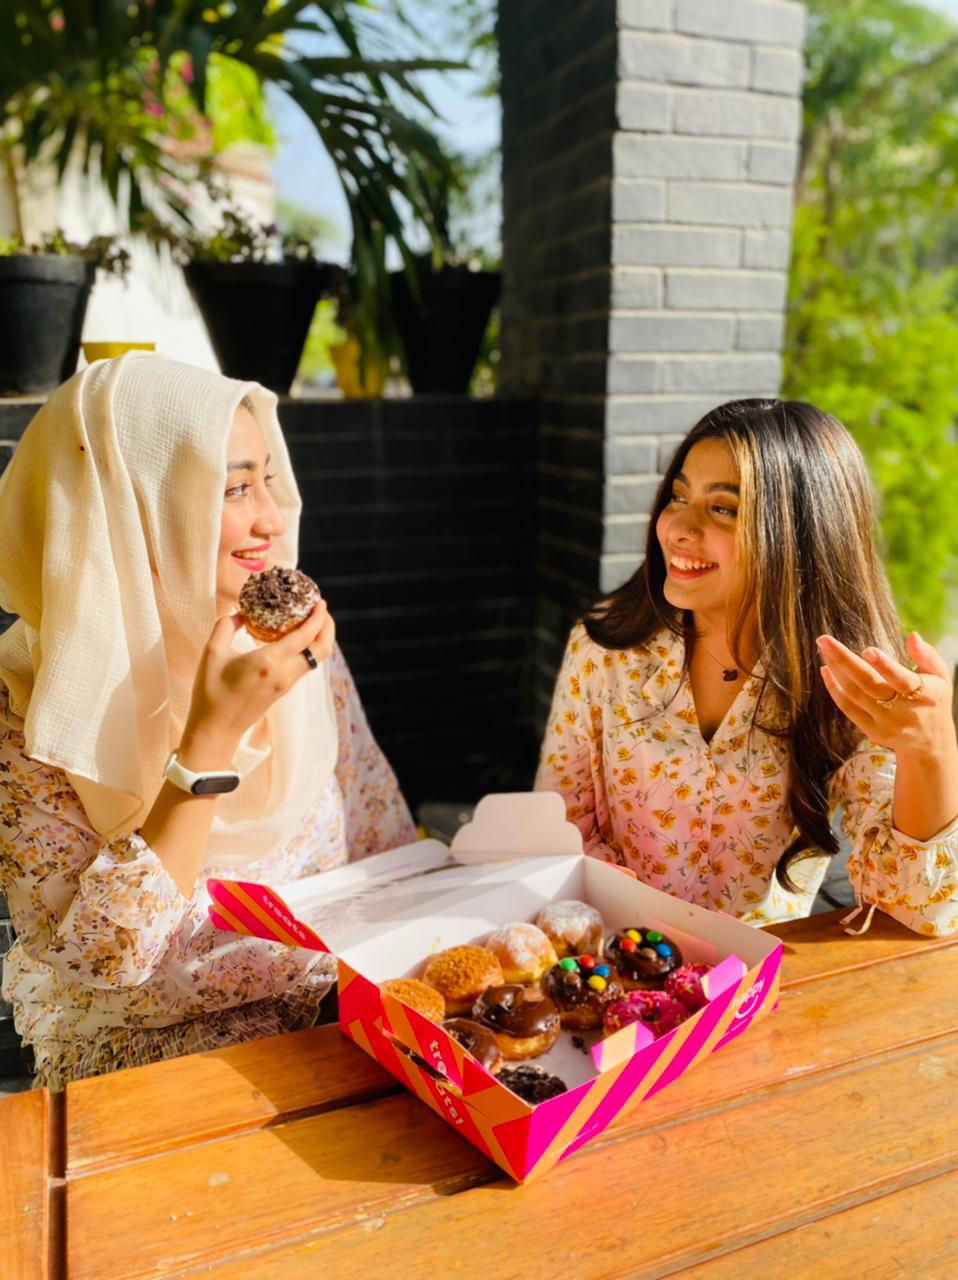
15. Show human interaction
Following the success on Instagram of the minimal, flat lay look, one of the classic styles in food photography is making a come – a variation of the movement trend now is showing human interaction and enjoyment of the food. Behind-the-scenes shots also work well on social media.

These are the captures from a Donut brand, which focuses heavily on human-centric pictures and their response is always so over-whelming.
How to style a food shot
What else do you need besides the food?
16. Backdrops
Consider different surfaces. For instance, dark, smooth, shiny wood might convey a premium restaurant. While, light, rustic wood will provide more of a country vibe. Make sure your surface is as flat as possible and if you plan to shoot on location, make sure you can lift it.
Your backgrounds should indicate what product you are capturing, for instance, in this picture, the Coffee Brand wanted to endorse a Date shake, and the props and the background suggest the same look.

17. Props
Cooking props, serving props, silverware, china, a tablecloth… the possibilities are endless, but always remember to add whatever contributes to your food story, and avoid cluttering the shot. Consider sticking to a neutral color palette that you can use over and over without the pieces becoming too memorable, so the food stays the hero.

18. Garnish
Garnish adds a dash of reality, freshness, and textures to the shot. Consider cooking ingredients like herbs, pomegranate shiny seeds, pepitas, chocolate shaves, and spread them gracefully.

How to master the light in a food shoot
Light can turn a good photo into an awesome one.
19. Set the mood
This is perhaps the simplest and cheapest trick of them all. One of the greatest tools you have available to you in food photography is light and the ability to control it. The tiniest gleam reflected off a juicy orange can create a highlight that makes you want to lick the fruit. Similarly, background darkness might have a more serious feel, and cleverly created patterns or shapes from shadows can create a designer look.
20. Natural vs artificial light
Some photographers love natural light, while others swear by artificial spotlights. But remember, harsh direct sunlight can wash out food, especially if it’s a light color such as white bread or mashed potatoes. Find shade or set up your shot near a window so that the light bounces off the food instead.
For a more controlled environment – so you don't have to rely on the weather – use artificial lighting with a reflector or bounce card. Start by working with a white tabletop, backdrop, and plates to familiarize yourself with your camera’s settings and limitations. Work your way towards incorporating more colors and patterns. Always light the scene from top, side, and back, to add shadows and depth.
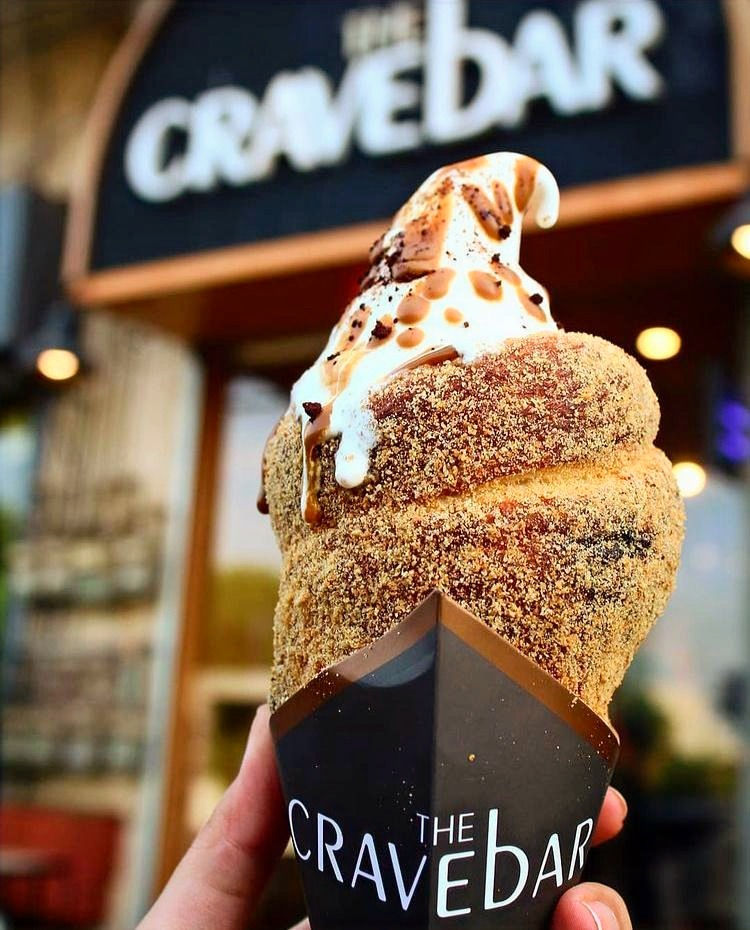
The picture shown below is taken in broad daylight, with the brand being endorsed at the back.
21. Use light box
Matte black cardboard folded in half and carefully placed around your shot can create dark shadows or absorb excess light, where white cardboard reflected back onto a dark area will reduce unwanted shadowing and help to create highlights.
Light boxes best work if someone is asking the content for their website or applications, since it gives a constant theme and controlled light. This is the easiest way to get a professional shot.

How to control the exposure in a food shot
This is the trick to give a crisp or soft look.
22. The balance between aperture and shutter speed
Like any type of photography what we want to achieve is the correct balance between the aperture of the lens (the amount of light you let in) and the shutter speed (how long you let that amount of light in). That will affect the final image, for a crisp or soft look.

How to select a camera for food photography
Your camera is at the center stage now.
23.Camera
There are so many brands and options in the market. First thing is to determine your budget and decide if you want interchangeable lenses. Mirrorless cameras also tend to be smaller and lighter in weight. When choosing a camera to consider the file size you want to work with, as larger image size is needed if you need to print your pics, and with a high ISO in case you don't use a tripod, and with multiple focusing options –the more the better–, and able to shoot raw files, because they are easier to edit.

24. Lenses
Here’s a quick cheat-sheet of different lenses and their benefits.
50mm is a good all-round lens, especially if you don’t have a zoom, good for shooting food from top-down and tablescapes. This is the lens I own and mostly use.
24-70mm zoom lens is a favorite of many food photographers for its versatility.
60mm macro, to avoid distortion.
100/110mm macro, good for portrait-style, vertical framing
80mm prime works for wider setups.

How to choose photography editing software
The final touches can make or break a picture.
25. Editing software
Editing can bring your photo to life. It’s your opportunity to reframe it and play with the exposure, contrast, highlights, and shadows. The Adobe Lightroom app is extremely user friendly and a go-to for many food and non-food photographers.

Having studied professional photography myself, I can safely say that what you’ve read are some of the fundamentals to taking professional like shots of food. Of course a lot more can be covered, but for that you’ll have to stay tuned to my blog and website!
Remember, like everything, it takes time to come up with the perfect shot. And it takes practice. It all starts with your passion for food and photography—it only gets better with time. Unless you do it, you’ll never know so keep practicing and never give up!

Comments